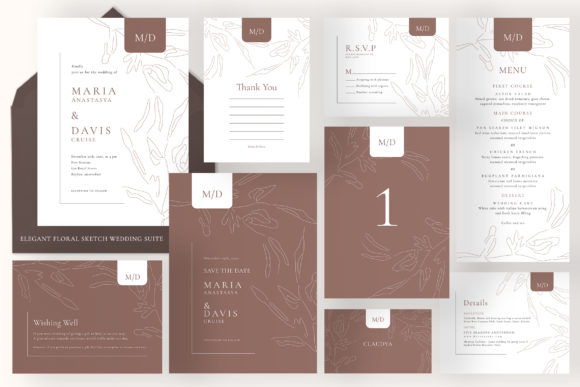
Elegant Floral Sketch Wedding Suite: A Practical Guide to Editing and Printing
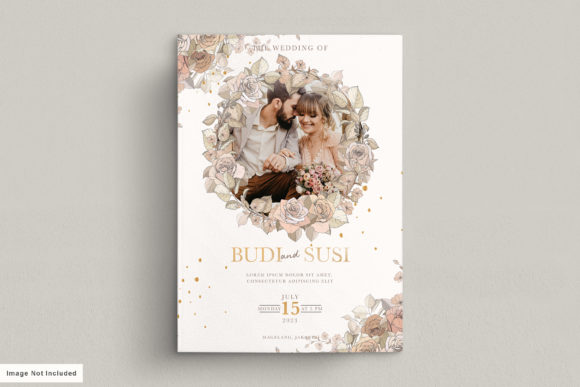
Selecting the right stationery template is about more than just falling in love with a delicate illustration; it is about ensuring the design functions seamlessly from your screen to the printer. The Elegant Floral Sketch Wedding Suite offers a sophisticated, hand-drawn aesthetic that appeals to couples seeking a timeless, organic look for their celebration. However, the beauty of this suite lies in its technical execution as much as its visual style. Because this collection relies on specific Photoshop architecture, understanding the file structure before you begin editing is essential to avoiding costly printing errors or frustrating design roadblocks.
This suite is not a generic template but a comprehensive system comprising nine distinct PSD files designed to work cohesively. When utilized correctly, it provides a professional-grade foundation for invitations, save-the-dates, menus, and table signage. Yet, many users encounter issues not because the files are flawed, but because they overlook critical specifications regarding size, bleed, and software compatibility. By addressing these common oversights early, you can ensure your final printed pieces match the elegance of the digital proof.
Verifying Software Compatibility Before Purchase
The most frequent point of failure for buyers of premium wedding stationery is assuming all image editors are created equal. The Elegant Floral Sketch Wedding Suite requires Adobe Photoshop CS3 or higher. This is a non-negotiable technical requirement. Users often attempt to open these PSD files in Canva, GIMP, Affinity Photo, or online PSD viewers, only to find that Smart Object Layers do not translate correctly or are entirely missing.
Smart Objects are the engine behind this suite’s editability. They allow you to replace placeholder artwork and adjust colors without degrading the original high-resolution data. If your software does not support this specific Photoshop feature, you lose the ability to make non-destructive edits. Before acquiring this suite, verify that you have access to a compatible version of Adobe Photoshop. If you are working with a designer, confirm they are using industry-standard tools rather than consumer-grade alternatives. This single check prevents the disappointment of purchasing a premium asset that remains functionally locked.
Navigating Size Specifications and Bleed Margins
Precision in sizing is where amateur designs diverge from professional results. This suite includes specific dimensions for each item, and deviating from them can lead to trimming disasters. For example, the Invitation is formatted at US A7 (5.25 x 7.25 inches), while the Save the Date, Details Card, and RSVP cards are US A2 (4.25 x 5.5 inches). Smaller items like the Wishing Well and Thank You cards utilize US A1 dimensions (3.5 x 4.875 inches).
A critical detail often overlooked is the 0.25-inch bleed setting. Bleed is the extra area of artwork that extends beyond the trim line, ensuring that when the printer cuts the paper, no unprinted white edges remain. Some users mistakenly resize the canvas to fit their preferred paper stock without accounting for this safety margin. If you scale the 5x7 Table Numbers or the 4x9 Menu without maintaining the proportional bleed zone, your floral sketches may be cropped awkwardly during production. Always set up your document guides to visualize the safe zone versus the bleed area before adding personalized text. This ensures that vital information, such as guest names on the 3.5 x 2 Place Cards, never sits too close to the cut line.
Understanding Color Management for Print Accuracy
Screens emit light; paper reflects it. This fundamental difference causes the "color mismatch" frustration many DIY brides and designers face. The Elegant Floral Sketch Wedding Suite is configured in CMYK color mode at 300 DPI. This is the correct standard for offset and digital printing, but it can appear duller on an RGB monitor compared to web-only graphics.
Do not convert these files to RGB for editing. Doing so shifts the color gamut and can result in muddy greens or desaturated pinks when printed. Instead, trust the CMYK values provided in the file. Fully editable colors and text backgrounds are included, allowing you to tweak the palette to match your specific wedding theme. However, always request a physical proof from your printer before ordering the full run. What looks perfect in Photoshop may require slight adjustment based on the paper texture and ink absorption. Utilizing the suite’s native CMYK profile minimizes variables, giving you the most predictable outcome possible.
Leveraging Documentation and Layer Organization
Efficiency comes from understanding how the file is built. This suite includes a Documentation PDF File Help guide, yet many users skip this resource and spend hours trying to locate specific elements. The PSD files utilize organized layer structures and Smart Objects specifically labeled for ease of use. Ignoring the documentation often leads to accidental deletion of background textures or misalignment of floral overlays.
Treat the documentation as a map. It explains which layers control global changes versus individual card adjustments. For instance, if you wish to change the sketch style across all nine items—from the large invitation down to the small place cards—the guide will direct you to the master smart objects rather than forcing you to edit each file individually. Respecting the file architecture saves time and preserves the integrity of the high-resolution assets. Remember, mockups are not included in this package. Do not waste time searching for presentation layers within the working files. Focus your energy on customizing the actual stationery components using the provided help resources.
Planning for Cohesion Across Nine Distinct Items
A wedding suite is a system, not a collection of isolated documents. With nine items ranging from the primary invitation to functional pieces like menus and table numbers, consistency is paramount. A common mistake is treating each PSD file as a separate project, resulting in mismatched fonts, varying opacity levels on the floral sketches, or inconsistent alignment.
Establish your typographic hierarchy and color adjustments in the main Invitation file first. Once approved, apply these exact settings to the corresponding Smart Objects in the other files. The 4x9 Menu should feel like a natural extension of the 5.25 x 7.25 Invitation, sharing the same visual weight and spacing logic. The 3.5 x 2 Place Cards, despite their small stature, must still accommodate legible typography that matches the larger formats. By approaching the Elegant Floral Sketch Wedding Suite as a unified ecosystem, you ensure that every piece of stationery reinforces the overall aesthetic rather than competing with it.
Making Informed Decisions for Professional Results
Ultimately, the success of your wedding stationery depends on respecting the technical boundaries of the medium. This suite offers immense flexibility through fully editable text backgrounds and high-resolution formatting, but that flexibility requires discipline. Check your software version, adhere strictly to the specified dimensions and bleed margins, maintain CMYK color integrity, and utilize the included documentation.
By avoiding the common pitfalls of incompatible software, ignored bleeds, and RGB conversion, you transform a digital download into tangible, heirloom-quality stationery. The Elegant Floral Sketch Wedding Suite is designed to deliver professional results for those willing to engage with its specific requirements. When you align your workflow with the file’s intended parameters, the result is a seamless, elegant presentation that honors both the artistry of the sketch and the significance of the occasion.